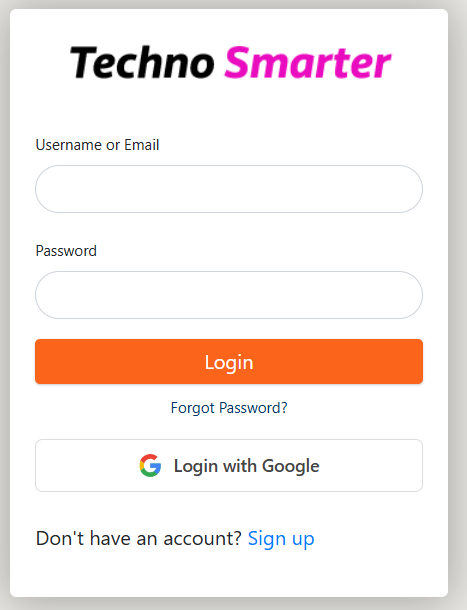
The Google login feature is important for websites. In this tutorial, we will integrate the Google login button in PHP and a MySQL database. In the previous tutorial, we created the login and registration form. Now, we will use the login and signup forms to integrate the " Login with Google button. If you are a developer or a beginner, we will discuss it in simple language with all the steps. If you don’t know how to create a login and registration form. So first, you have to learn how to create a login and registration form, then you will be able to integrate the "login with Google" button into your website. First, we will need the Google client ID and the Google Secret.
Step 1: Create Google OAuth Credentials
Before writing any code, you need to register your application in the Google console and get a Google Client ID and secret keys. It’s a very important step if you are getting a client ID and a client secret from the Google console.
Let’s register the application on the Google console.
1. Go to Google Cloud Console: Log in with your Google account and create a new project.
https://console.cloud.google.com/
If you see, like this -
Welcome, Jack!
Create and manage your Google Cloud instances, disks, networks, and other resources in one place.
Simply select your country and agree to continue. You can read the complete terms and conditions before proceeding.
2. Api & Service: From the left navigation menu, select API & Service. When you hover over the API & service option, you will see more options, and you need to select the Oauth consent screen.
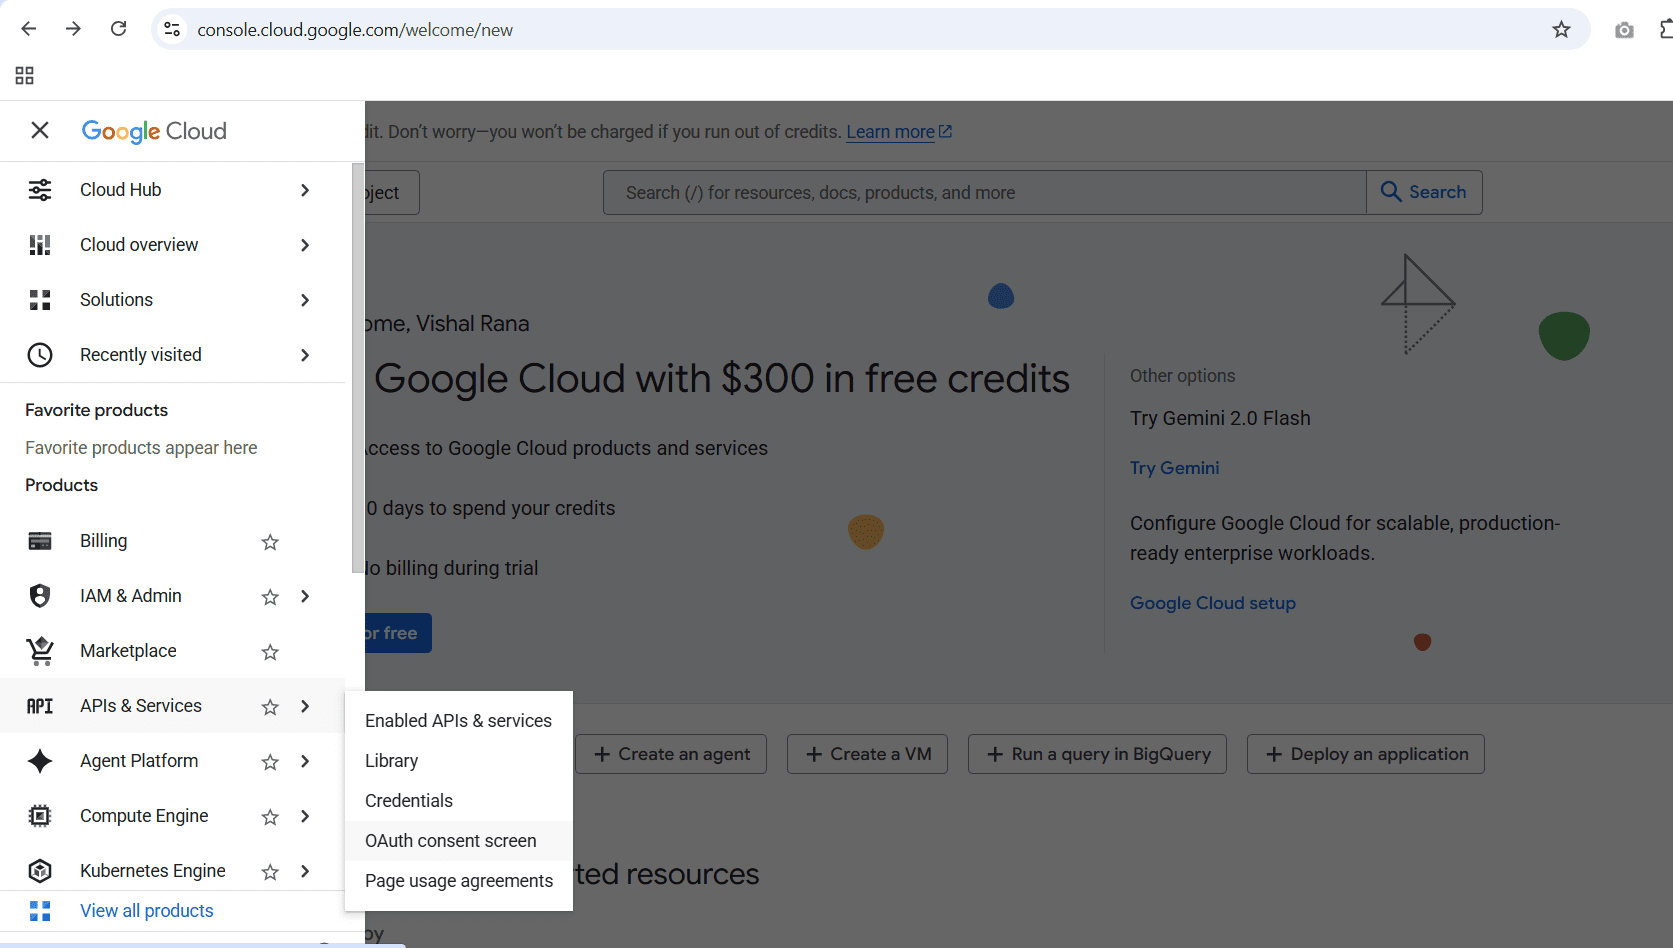
API & service-> select Oauth consent screen -> Create Project if no project is available.
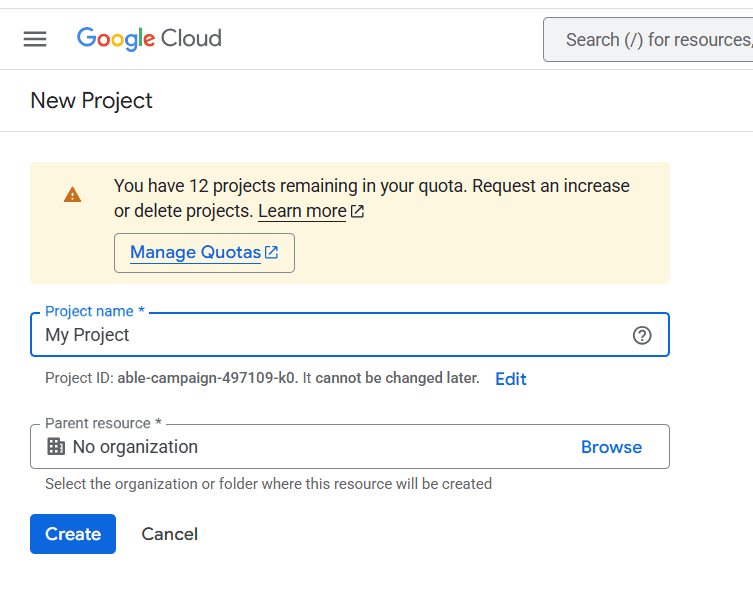
3. Create project: Click on the create project button and fill in your project name. You can use the default name and click on the create button. After the process, you will see the get started button. Click on it.
4. App Information: Enter your app name and select your email ID. Click on the next button.
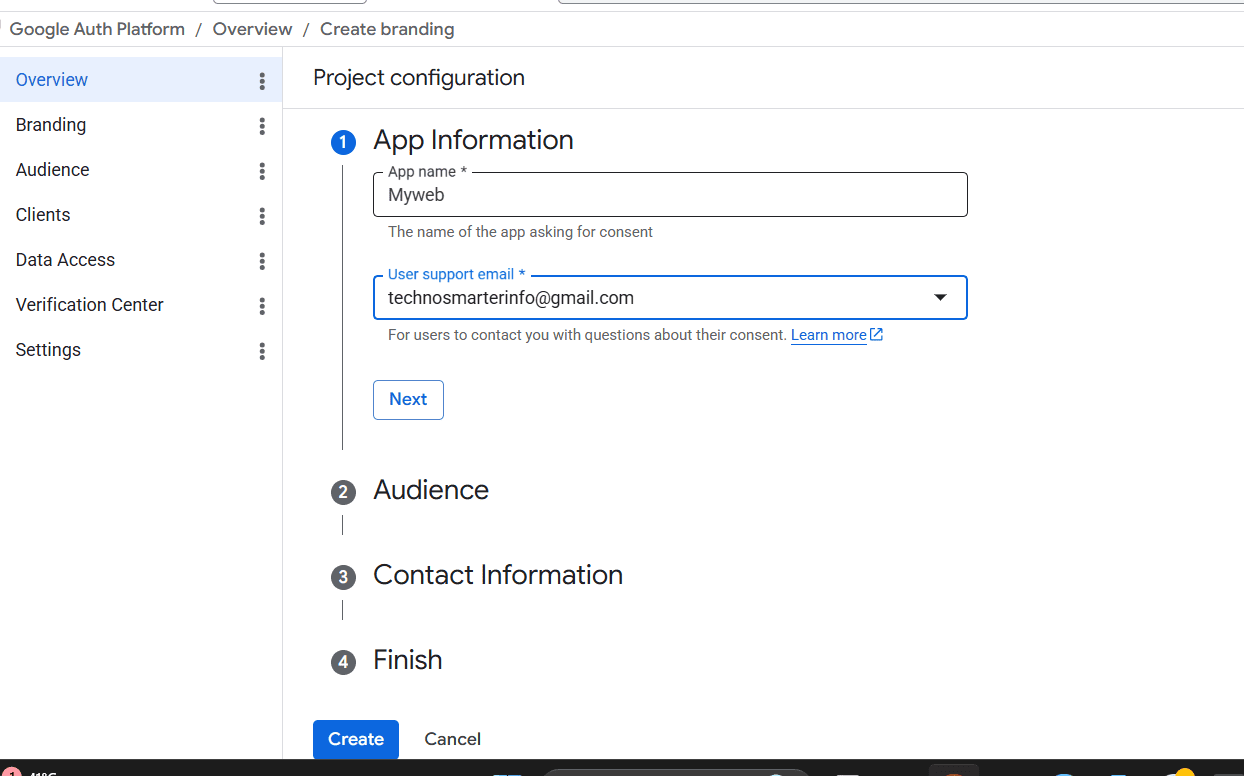
5. Configure OAuth Consent Screen: Select 'External' as the user type and click next. Now enter your Contact email and click on the next button. Finish and create.
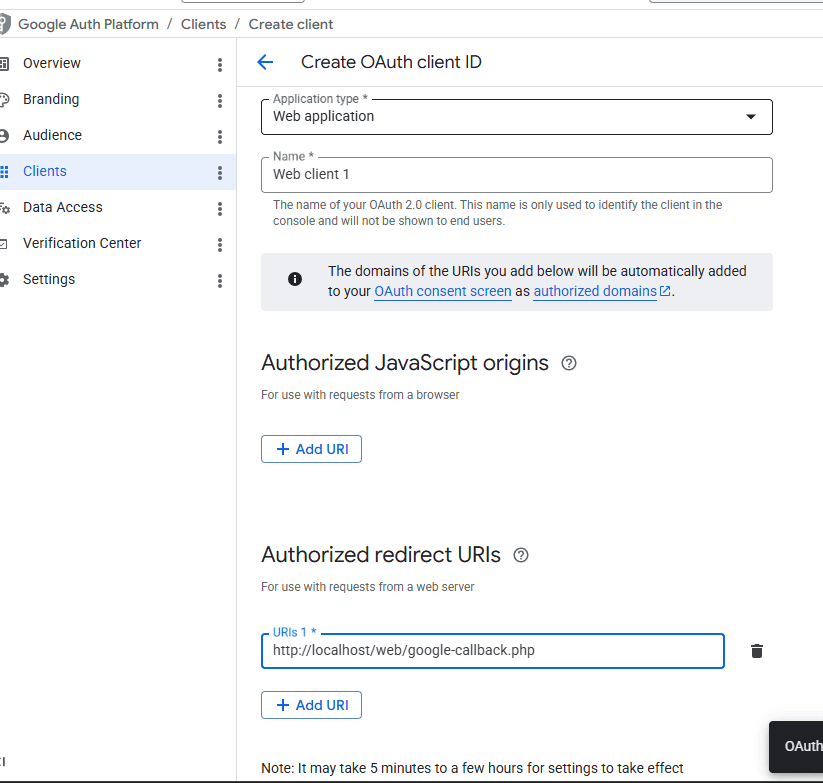
6. Create Auth Client: You haven't configured any OAuth clients for this project yet. Click on the Create Auth Client.
7. Application Type: Select 'Web Application' from the dropdown menu.
8. Authorized Redirect URIs: This is the most crucial step. Enter the exact absolute URL of your callback file, for example: http://localhost/web/google-callback.php. We will create this file in our project folder.
9. Save Keys: Once saved, Google will provide you with a Client ID and a Client Secret. Copy these values into a safe place. You can download keys and save in your local computer.
Step 2: Install Google API Client Library
To interact with Google’s OAuth services, we rely on the official Google API Client Library for PHP.
First of all, check if Composer is installed on your computer. If you don’t know how to install composer in computer. You can check this tutorial on how to install Composer on your computer.
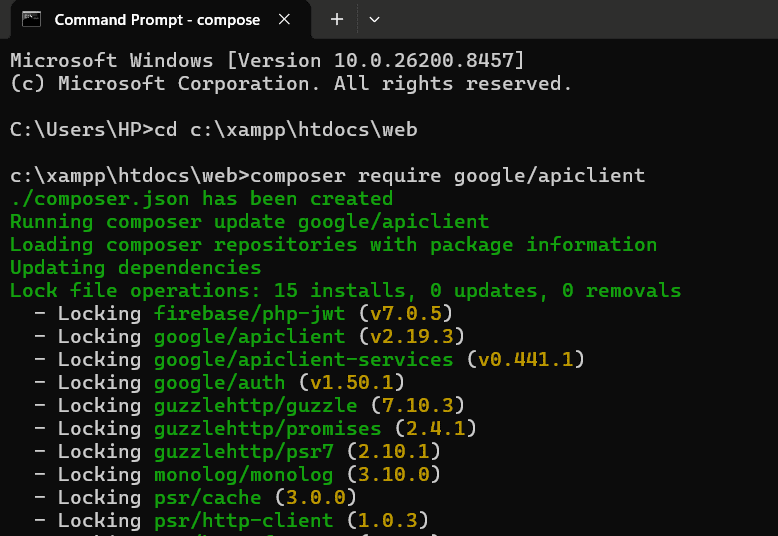
Open your CMD and set the path to your project
cd c:\xampp\htdocs\web
Run the command to reach your project folder, as we are using “web”.
Now, install the Google API client library with this command in the same web folder.
composer require google/apiclient
Note: If you aren't using Composer, you can manually download the official SDK directly from GitHub and extract it into a folder named google inside your root directory.
https://github.com/googleapis/google-api-php-client
This is the best practice if you install the Google API client library with Composer and the command prompt.
It will take a while to Google the client file in your project folder.
Step 3: Initiate the Auth Request (google_auth.php) | Login with Google
When a user clicks the "Login with Google" button, this request script should be run. This file prepares the secure request parameters and redirects the user to Google's official login screen.
Create a file named google_auth.php and paste the following code.
<?php  require_once "google/vendor/autoload.php";
$gcid="8123326sd40xx6b57dmncd.apps.googleusercontent.com";
$gcsecret="GOCSPXs-2asdcxxAEsdaN04mxNEa8b8UGSjl1wNpbVmC";
if(!empty($gcid) && !empty($gcsecret)) {

    if (!class_exists('Google_Client')) {
        die("Google Client library not found.");
    }

    $client = new Google_Client();

    $client->setClientId($gcid);
    $client->setClientSecret($gcsecret);

    $ru = 'http://localhost/web/google-callback.php';
    $client->setRedirectUri($ru);

    $client->addScope("email");
    $client->addScope("profile");
$default_url="http://localhost/web/account.php";
    $to = isset($_GET['to']) && $_GET['to'] != '' ? $_GET['to'] : $default_url;

    // basic safety: prevent external redirects
    if (filter_var($to, FILTER_VALIDATE_URL) && !str_contains($to, '$default_url')) {
        $to = $paypath;
    }

    $client->setState(base64_encode($to));

    header("Location: " . $client->createAuthUrl());
    exit;
}
?>
Explanation of the code
Google Client ID & secret: Use the same Google Client ID and Google client secret that we copied from the Google Cloud Console. Variables -
$gcid="xxxxxxxxxx"; $gcsecret="xxxxxxxxxxx";
Callback URL: Must set the correct callback URL of your project, which you’ve submitted in Google Cloud Console while registering your application in Google Cloud Console; otherwise, you will get a Callback URL mismatch error.
Google_Client(): This initializes the core SDK wrapper object, which communicates directly with Google API endpoints.
addScope(): Defines exactly what user data your application requests access to. In our case, we need the email and standard profile values.
setState(): If a user tries to access a restricted inner page first, we can track their intended landing destination by encoding it into the state parameter. Google safely passes this parameter straight back to our callback file.
Default URL: Default URL of your account page.
$default_url = "http://localhost/web/account.php";
Request scope: Requesting permission to access the profile and email scope.
$client->addScope("email"); $client->addScope("profile");
Step 4: Receive data in Callback & Save to MySQL database or login (google-callback.php)
Now we will create a callback PHP file that is used to verify user data register and login.
When users click on the “Login with Google“ button, they are redirected to the Google login page to authenticate. Users select their Google email ID and click on the continue button. They allow login access to the website.
Google verifies the authentication request, and Google bounces them back to your callback URL along with a temporary verification code string embedded in the URL.
This file exchanges that single-use code for an access token, pulls the profile data, and registers the user inside MySQL if they don't already exist.
Create your google-callback.php file using this PHP script: google-callback.php
<?php require "config.php"; require_once "google/vendor/autoload.php";
$client = new Google_Client();
$gcid="8123326sd40xx6b57dmncd.apps.googleusercontent.com";
$gcsecret="GOCSPXs-2asdcxxAEsdaN04mxNEa8b8UGSjl1wNpbVmC";
$client->setClientId($gcid);
$client->setClientSecret($gcsecret);
$ru='http://localhost/web/google-callback.php';
$client->setRedirectUri($ru);

if (!isset($_GET['code'])) {
    exit("Invalid login attempt");
}

$token = $client->fetchAccessTokenWithAuthCode($_GET['code']);

if (isset($token['error'])) {
    exit("Google login failed");
}

$client->setAccessToken($token);

$oauth = new Google_Service_Oauth2($client);
$userInfo = $oauth->userinfo->get();

$email = $userInfo->email;
$fname = $userInfo->givenName;
$lname = $userInfo->familyName;
$avatar = $userInfo->picture;
//  Decode redirect URL safely
$redirect_to = 'http://localhost/web/account.php';
if (!empty($_GET['state'])) {
    $redirect_to = base64_decode($_GET['state']);
}

$sql = "SELECT COUNT(*) as total FROM users WHERE email='$email'";

$res = mysqli_query($dbc, $sql);

$row = mysqli_fetch_assoc($res);

$user_count = $row['total'];

if ($user_count == 0) {

   // Base username from first + last name
$base_username = strtolower($fname . $lname); // remove underscore if you prefer
$base_username = preg_replace('/\s+/', '', $base_username); // remove spaces
$username = $base_username;
$counter = 1;

while (true)
{
    $check = mysqli_query($dbc,
    "SELECT COUNT(*) as total FROM users WHERE username='$username'");
    $row = mysqli_fetch_assoc($check);

    if($row['total'] == 0)
    {
        break;
    }

    $counter++;
    $username = $base_username . $counter;
}


      $date=date('Y-m-d');
$user = mysqli_query($dbc, "INSERT INTO users(fname,lname,username,email,date)
VALUES('$fname','$lname','$username','$email','$date')");

if(!$user)
{
    echo 'Something went wrong...';
    exit();
}

 $userid= mysqli_insert_id($dbc);

} else {

  $findresult = mysqli_query($dbc, "SELECT id FROM users WHERE email='$email'");
if($res = mysqli_fetch_array($findresult))
{
$userid= $res['id'];
}

}
  $_SESSION["login_sess"]="1";
  $_SESSION["userid"]= $userid;

// Redirect
header("Location:". $redirect_to);
exit;
Explanation of the code –
Google Client ID & secret: Now, we need to add the Google client secret and the Google client ID in the callback file that verifies the API request. Variables - $gcid="xxxxxxxxxx"; $gcsecret="xxxxxxxxxxx.
fetchAccessTokenWithAuthCode(): Converts the brief single-use validation code passed in the URL into a heavy token object necessary for authenticating API resource calls.
Google_Service_Oauth2: A helper class map designed to read identity payloads like email, names, and profile pictures from Google accounts.
The Unique Username Loop (while(true)): This is the important part of every registration. It removes the duplication of usernames. Suppose if mohankumar is a username and he already created account. If someone with the same name comes on the login or register page and clicks on Login with google button so here this part will check and convert a unique username like mohakumar1 , mohankumar2 .
Session State Storage: Feeds the local user auto-increment ID straight into standard session structures ($_SESSION["userid"]), matching the exact environment setup used by standard email/password registration routes.Add a Login with Google button in Login and registration page in PHP
Open your login.php and signup.php in a text editor and add these code lines
<a href="google-auth.php?to=http://localhost/web/account.php" class="google-btn">
<img src="google.svg" alt="Google" class="google-icon">
<span>Signup with Google</span>
 </a>
It’s only a Login with Google button code. Kindly set your google-auth.php file path and account return path http://localhost/web/account.php correctly. You need to add the same code lines to your register page.
Download the Google.svg image file from the internet or use any Google PNG or JPG image.
Styling Login with Google button –
You can design your Login with Google or Signup with Google button with the CSS given below.
.google-icon {
  width: 18px;
  height: 18px;
}

.google-btn {
    display: flex;
    align-items: center;
    justify-content: center;
    gap: 10px;
    background: #fff;
    color: #444;
    border: 1px solid #ddd;
    border-radius: 6px;
    padding: 10px 16px;
    font-weight: 500;
    font-size: 14px;
    text-decoration: none;
    transition: 0.3s;
}
In this way, you can easily integrate Login with Google button in PHP and MYSQL. Test your Login with Google feature, and for the registration page, sign up with the Google button
Recommended Posts:-